Ok, so I got inspired (and a touch over-excited) by the new-to-me artist Rebecca Latham, and decided to try out the "miniature" technique on my owl. It just so happens I have quite the stock of illustration board in my studio (yay) so nothing stands in my way :)
First of all, I'd have to prepare my illustration board. It comes in these huge 20xsomething sheets, and I figured I'd cut out some 5x7 cards to work with. I knew I'd definitely want one to test techniques on, and at least one other for the owl itself.
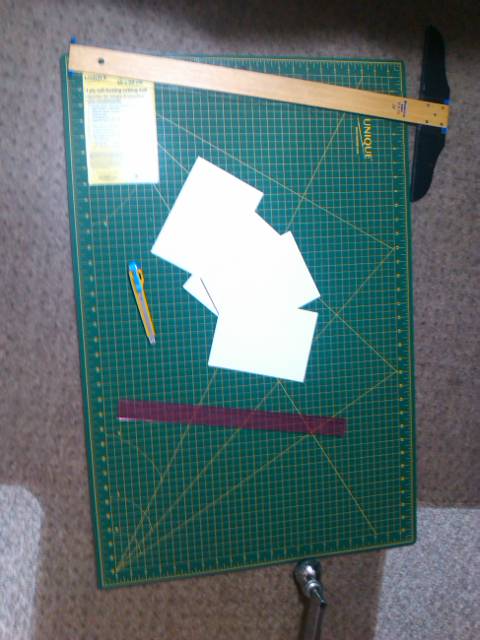
I got out my handy-dandy (and also new to me) t-square, and my large cutting matt, and measured out 7". I used my exacto knife to cut the board lightly and repeatedly until the piece came free. I then cut the 7" strip into 5" pieces.
Sorry about it being sideways - can't seem to remember how to fix it at the mo. Okay, so now that I had my materials, it was time to figure out how I was going to transfer the drawing. The first thing I thought of was my handy-dandy light table (i.e. window), but illustration board is waaayyyy to thick for light to go through. My second thought was to use my projector. It's exactly perfect for this sort of thing and I hardly ever get to use it! Perfect!
Turns out, not so perfect. The image I want to do is smaller than 5x7. The projector REALLY doesn't want to go to that size. I can do 8x10, but not smaller without the image being so out of focus as to be not useable. Okay, okay, I give up. Guess we go back to the tried-and-true method of tracing paper.
So I took my image to the my light table (read "window"), taped it on, taped a piece of tracing paper over top and started tracing. (yay).
I honestly don't care for the tracing step. It's very tedious and boring (compared to creating the image) and then of course I will have to do it again to get it onto the illustration board (yay). Also my image wasn't dark enough in many places to see through the tracing paper, so I had to stop at least once, to go over my drawing to darken the lines (grrr).
Well, now that the tracing (part 1) is done, I can go ahead and test the illustration board for painting techniques. I have only used illustration board one other time to do an image of lillies on an inked black background. It was done mostly with dry washes, so I hadn't really gotten a chance to see what the board could take (compared to watercolour paper).
I found out some interesting things in testing out the board. 1) I really should stand when I paint - I get a much better feel for the brush and things don't look quite so amateur (even though that is what I am). 2) illustration board dries MUCH faster than paper - even when you load it with water! 3) the board takes a lot more water than you'd expect. I tried to use as much as when I did the crocus painting, but it was difficult to measure because the brushes were so small. 4) the board takes a lot of water and doesn't buckle or warp the way paper does. It acts more like stretched paper, but I've even had that buckle on me. 5) acrylic brushes really must be used when applying pigment to a wet area. I was testing with natural hair brushes, and they kept lifting pigment, or water, or even losing hairs (grrr). 6) dry-brushing fur is not as easy as it looks. Here are my testing efforts:

I really looked like I knew what I was doing up till this didn't I? Okay so there's a lot of learning curve here. I think I will persevere with this one though. I want to try the tests out again, applying what I learned and see if I can do better. If not - back to basics we go!